


 AI-generated illustrative image
Creating an event on RideTree – step by step
From the event to registration: Here’s how to create an event.
Are you planning a ride, a meet-up or another event? On RideTree, you can create an event for this, specifying the time, meeting point, visibility and, optionally, a list of participants.
Enter basic details and the date and time
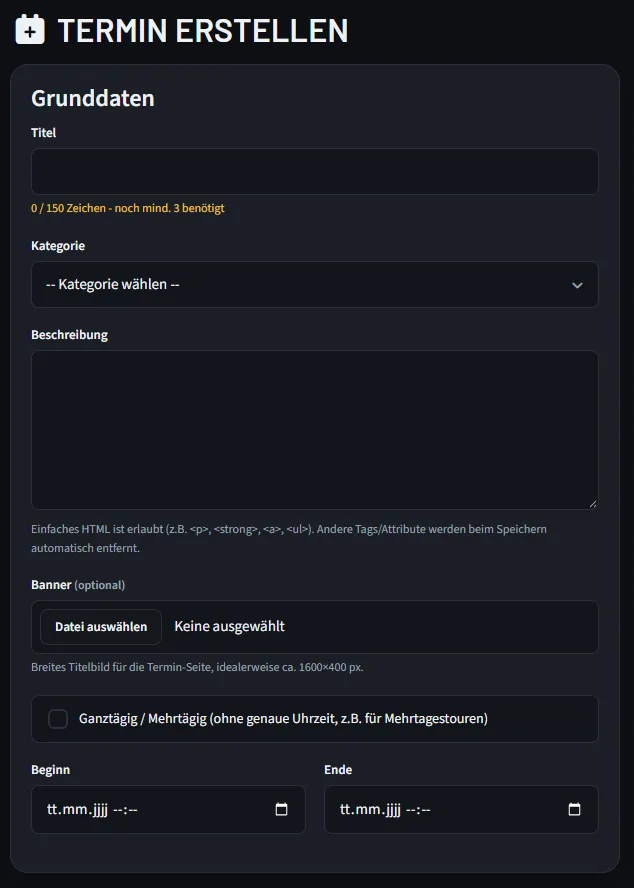
Open ‘Create event’. Give it a clear title, select the appropriate category and describe the programme. Enter the start and end times; there’s a separate option for all-day events. You can also add a banner.
Select visibility, meeting point and route
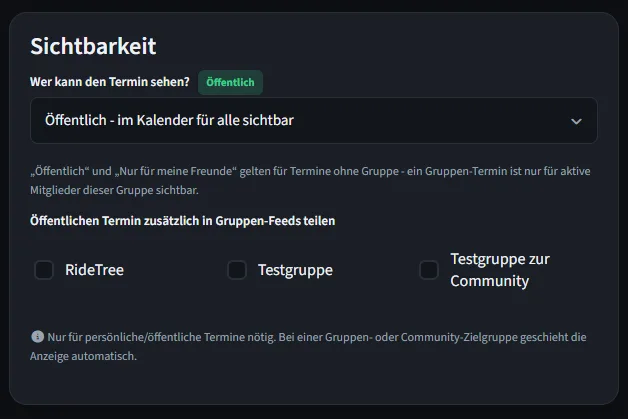
Decide who can view the event: public, friends only or – if this option is available – selected groups or a community. Select a meeting point under ‘Start’. The destination and GPX route are optional. For a ride, you can also specify relevant safety and riding rules.
Set up registration and publish
If you want others to be able to register, leave the participant list active. Among other things, you can set a maximum number of participants, a registration deadline and whether registrations are approved. Check your details and tap ‘Publish event’.
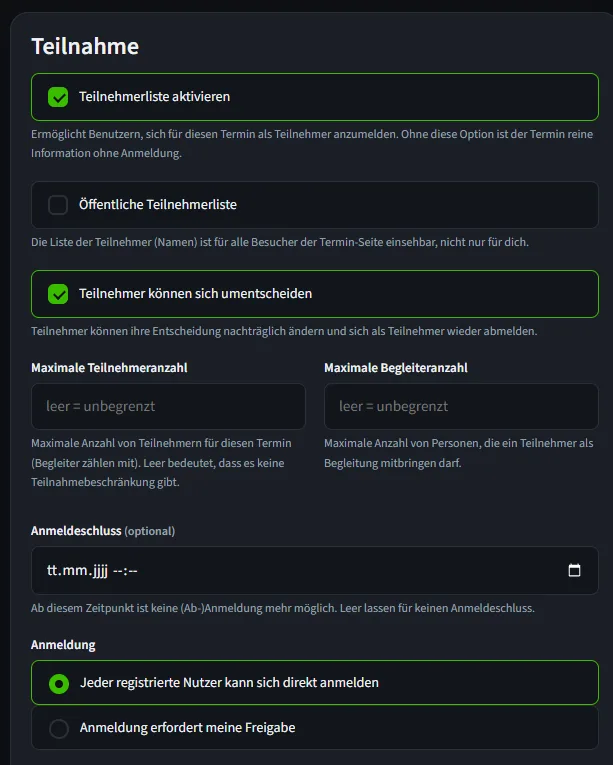
Without an active participant list, the event is for information purposes only; registration is not possible in this case. Some group and series functions depend on your approval.
Frequently asked questions
Is a GPX route compulsory?
No. A route as a GPX file is optional for the event.
Can I offer an event without requiring registration?
Yes. To do this, deactivate the participant list.