


 AI-generated illustrative image
Creating a group on RideTree – step by step
Your own motorcycle group on RideTree is the ideal starting point if you ride regularly with friends, want to meet new riding partners in your region or would like to organise an existing motorcycle club digitally. When creating the group you can set not only the name and location but also how new members may join, which ride rules apply and how your group presents itself to others.
1. Create a new group
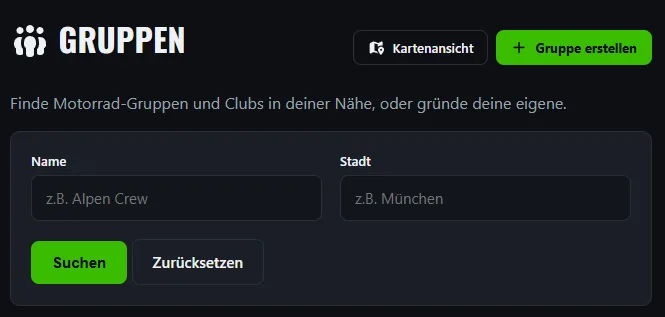
First open the "Groups" area on RideTree. Next to the map view you will find the "Create group" button, which takes you straight to the form for a new group.
Before you start, it is worth thinking briefly about what your group should stand for. A regional after-work ride, for example, needs different information from a nationwide motorcycle club or a group for adventure bike tours.
2. Enter your group's basic details
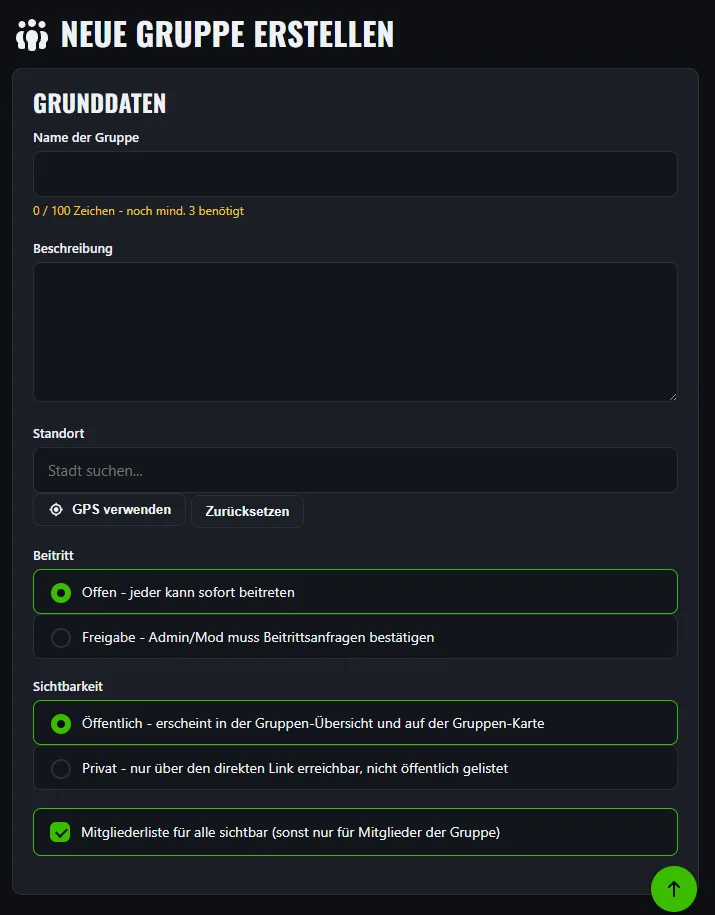
In the "Basic details" section you set the most important information. A meaningful group name comes first. It should be as unambiguous as possible and give other riders a first idea of what your group is about.
In the description you can then explain in more detail who you are looking for and what kind of motorcycle tours or joint activities you plan. Useful details include your preferred region, riding style, typical tour lengths or whether beginners are expressly welcome.
For the location you can select a city or a central place. Alternatively, if your device supports it, you can use your current location via GPS. The location helps other users discover suitable groups in their area.
3. Decide how new members can join
As group admin, you decide how joining should work.
In an open group, interested users can join immediately. This option is particularly suitable for relaxed regional groups that want to meet new riders without any fuss.
Alternatively, you can specify that an admin or moderator must confirm every join request. This makes sense if you want to take a look at new members first or deliberately keep your group more personal.
4. Set the group's visibility
You can also set the visibility directly when creating the group.
A public group appears in the group overview and on RideTree's group map. This means other users can find it, which is especially useful if you want to attract new members.
A private group, on the other hand, is not listed publicly and can only be reached via the direct group link. This setting suits a close circle of friends or an existing closed motorcycle community, for example.
You can also choose whether the member list is visible to everyone. If this option is switched off, only members of the group can see the full member list.
5. Set shared ride rules
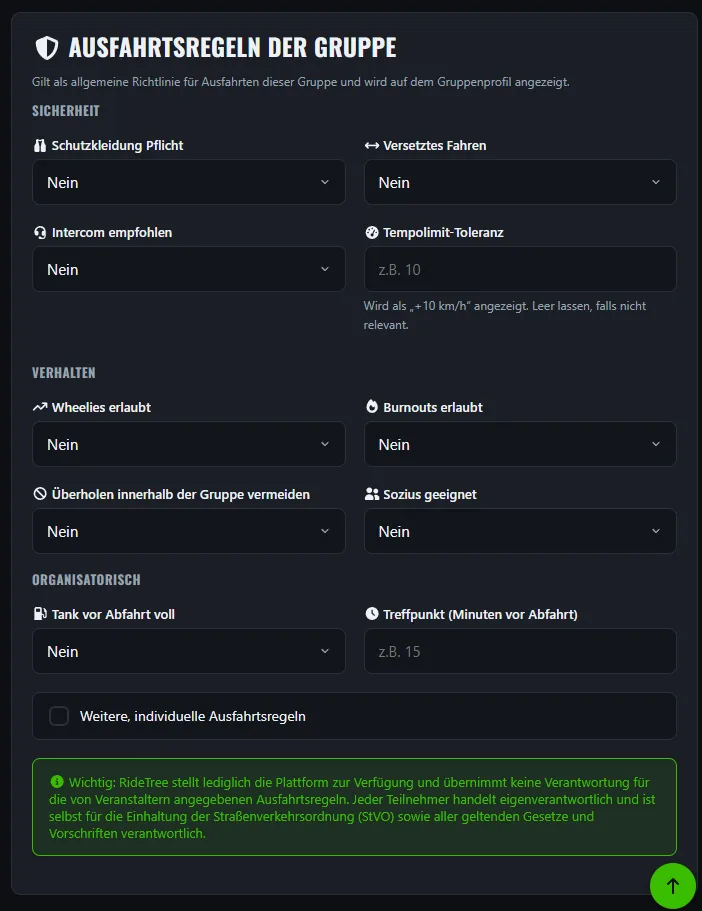
The group's ride rules are a particularly helpful section. They serve as a shared guide for future tours and are shown on the group profile.
Here you can specify, for example, whether protective clothing is required, staggered riding is preferred or an intercom is recommended. You can also state the desired tolerance on speed limits.
You can also define rules for behaviour within the group – for example, whether wheelies or burnouts are allowed, whether overtaking within the group should be avoided or whether the tour is suitable for riders with a pillion.
Organisational points can also be settled right away, such as a full tank before departure or how many minutes before the start all participants should be at the meeting point.
If you have further rules of your own, you can add additional custom ride rules.
One thing remains important: every rider is personally responsible for their own behaviour on the road. Rules set within a group replace neither traffic law nor the participants' personal responsibility.
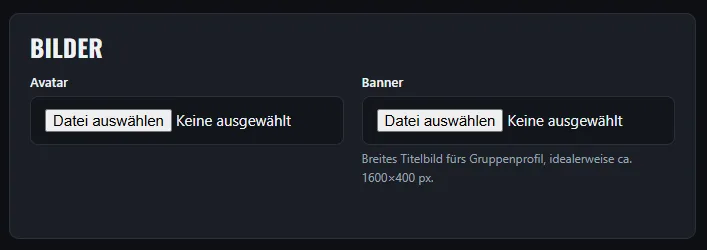
6. Add an avatar and group banner
Suitable images make your group much more recognisable.
The avatar is used as a compact group image and should therefore also work at a small size. A group logo, a motorcycle motif or a distinctive photo are good choices.
The banner forms the visual background or cover image of the group profile. Wide landscape shots, a group photo or a motorcycle motif from a typical ride work particularly well. RideTree recommends a format of roughly 1600 × 400 pixels.
7. Link social media channels
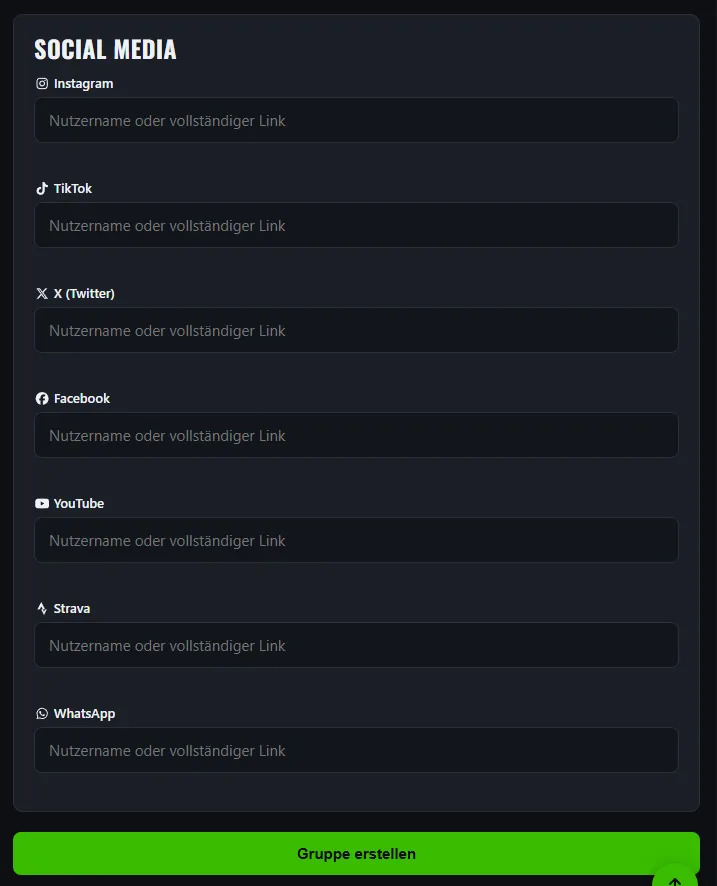
If your group is also active outside RideTree, you can add various social media channels directly. Supported platforms include Instagram, TikTok, X, Facebook, YouTube, Strava and WhatsApp.
Depending on the platform, you can enter the username or a full link. This way, interested members quickly find your community's other channels.
You don't have to be everywhere, though. It's best to add only the platforms you actually keep up to date.
8. Create the group and then complete it
Once you have entered all the details you want, you can finish setting up with "Create group".
That only lays the foundation, however. An attractive group lives on current information and joint activities. So after creating it, add things like group rules, announcements, shared events, rides or interesting motorcycle spots.
Especially at the beginning, it is also worth publishing a short welcome or a first post. New members can then see at once that the group is actively looked after.