


 AI-generated illustrative image
Setting up your group profile completely – making your RideTree group inviting
Your group has been created – now its profile should show who you are and what new members can expect. A clear description, suitable images and understandable settings turn an empty group page into a good invitation to ride along. This guide takes you through the most important tabs for editing a group.
1. Open and edit the group profile
Open Groups and go to your group. If you are allowed to manage it, you will find the "Edit" button at the top of the group profile. The settings are divided into the tabs "General", "Ride rules", "Group rules", "Group chats", "Images" and "Social media".
First check what visitors without a membership see: is it immediately clear where you ride, who the group is for and how to join? Name, description and settings should answer these three questions.
2. Sharpen name, description and location
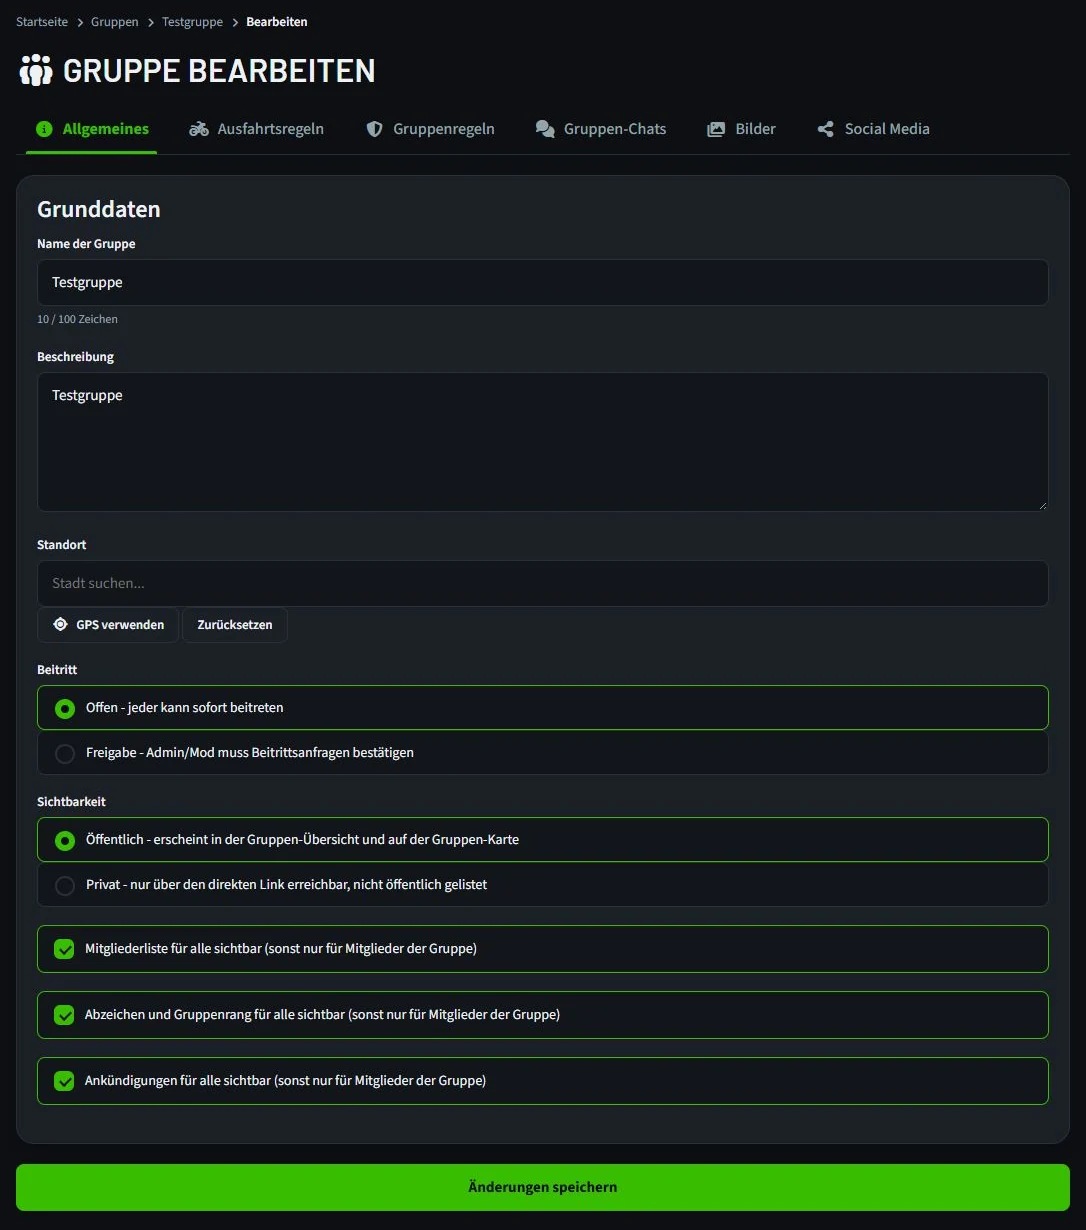
Under "General" you will find the name, description and location. A good name states your shared theme or your region. In the description, concrete details help more than a general "We like riding motorcycles": do you mostly do after-work rides or day tours? What is your pace? Are newcomers and riders with a pillion welcome? Roughly where do you meet?
Example: "We do relaxed after-work rides around Kassel and occasional day tours in the Weser Uplands. New riders are welcome; we agree on pace and breaks before every tour." Only state expectations that really apply to you.
Select the location from the results list so that the group can also be placed correctly on the map. Change the group name with care: this also changes the link to the group.
3. Choose suitable joining and visibility settings
In the same tab you decide whether interested people can join immediately or whether admins or moderators approve requests. An open group makes it easy to get started; approval gives you more control over new members.
For visibility, "Public" means that the group appears in the overview and on the map. "Private" means it can only be reached via the direct link. Also consider whether the member list, badges and announcements should be visible to people outside the group. Check your selection carefully before saving.
4. Add an avatar and banner
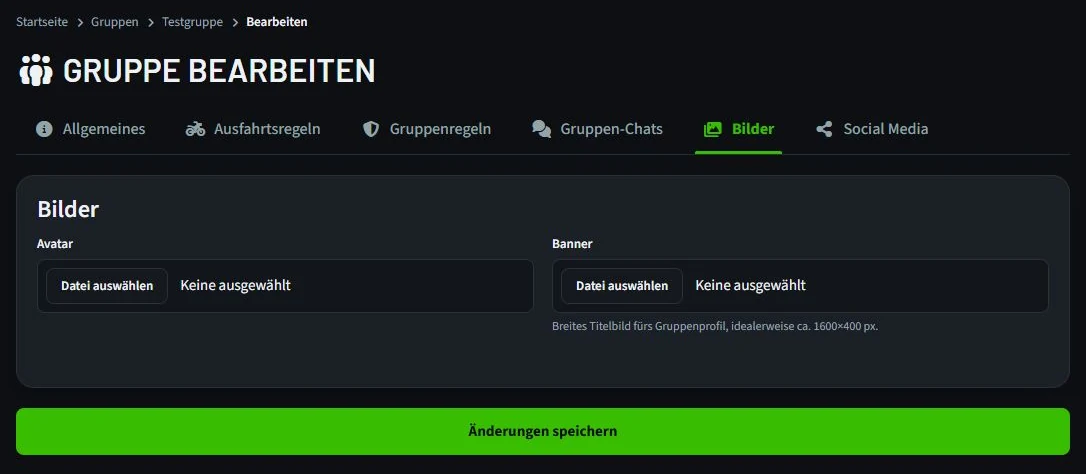
In the "Images" tab you can upload an avatar and a banner. The avatar is the group's small identifying image; a simple, clearly legible motif works best. The banner shapes the first impression of the profile. For the wide cover image, RideTree recommends roughly 1600 × 400 pixels.
Wherever possible, use your own images for which you hold the necessary rights. A typical meeting point, a shared ride or a group motif says more about you than any stock photo. After saving, check that the image crop looks good on a phone.
5. Write clear ride rules and group rules
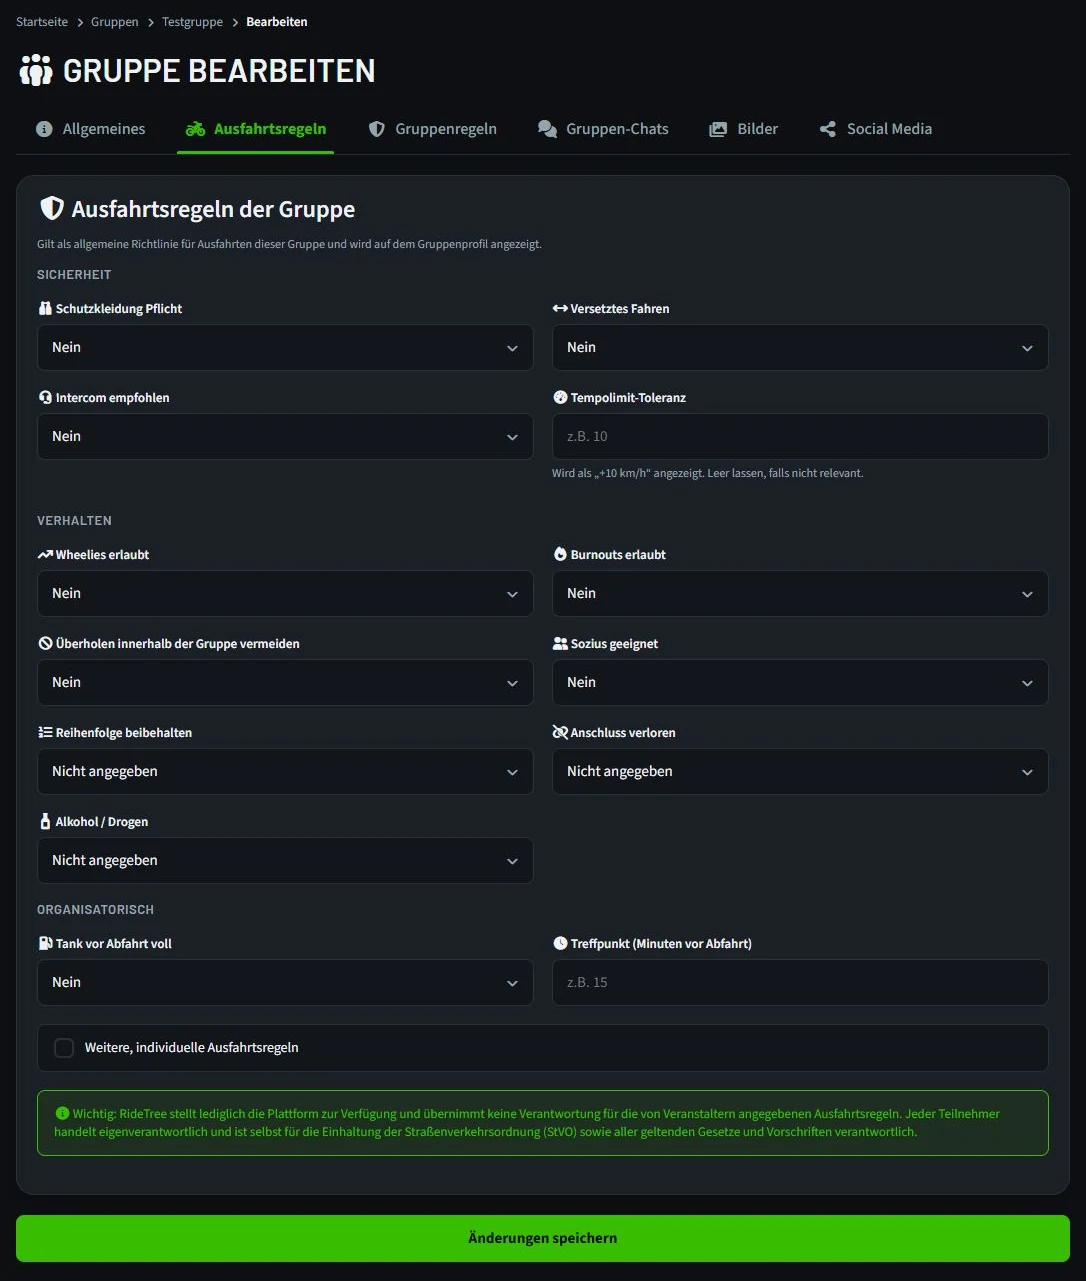
Under "Ride rules" you can enter the shared guidelines for tours, such as protective clothing, staggered riding, intercom, a full tank and meeting time. Only add details that really apply to your rides. The profile shows these rules; before a specific tour, you should also settle any special arrangements directly.
In the "Group rules" tab you set out general expectations for how you treat each other. Short rules with a clear title help more than long lists of prohibitions. For example: "Respectful interaction – please keep criticism of riding style or planning objective and free of personal attacks."
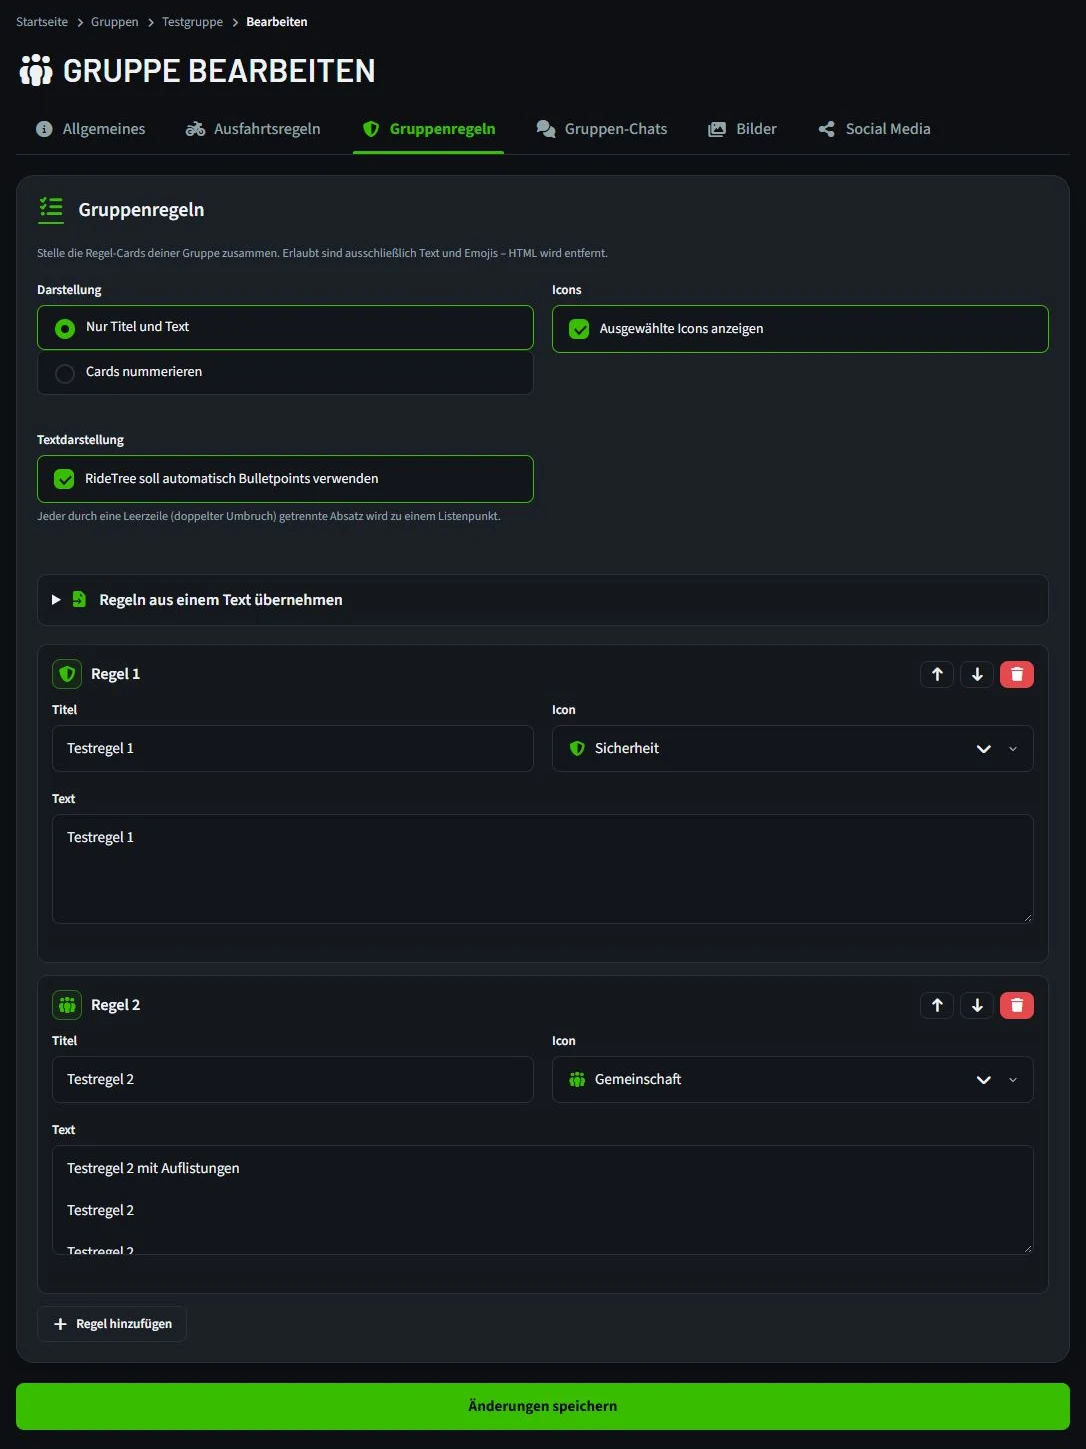
Group rules replace neither traffic law nor each individual's responsibility on the road.
6. Only link chats and external channels when needed
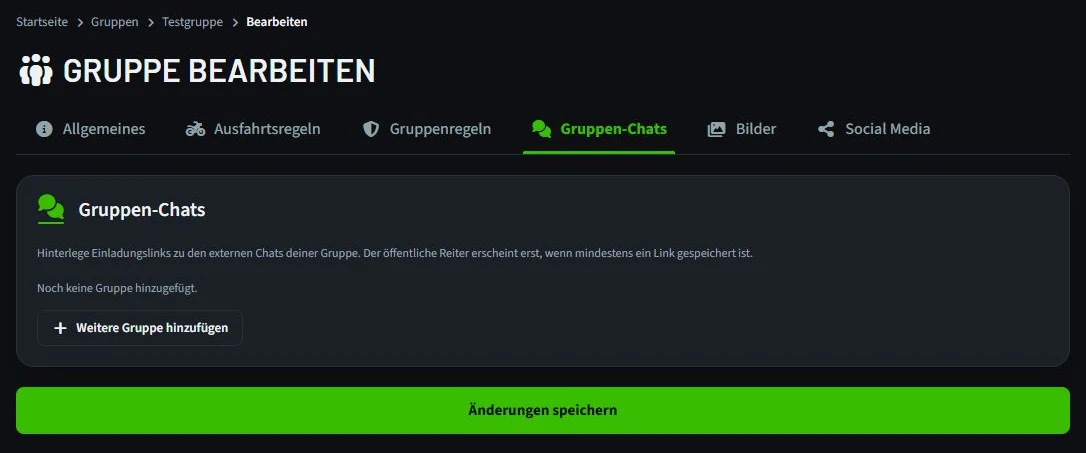
Under "Group chats" you can add invitation links to your external chats. The public tab only appears once at least one link has been saved. First check who can join via such a link and whether the chat is meant for new members.
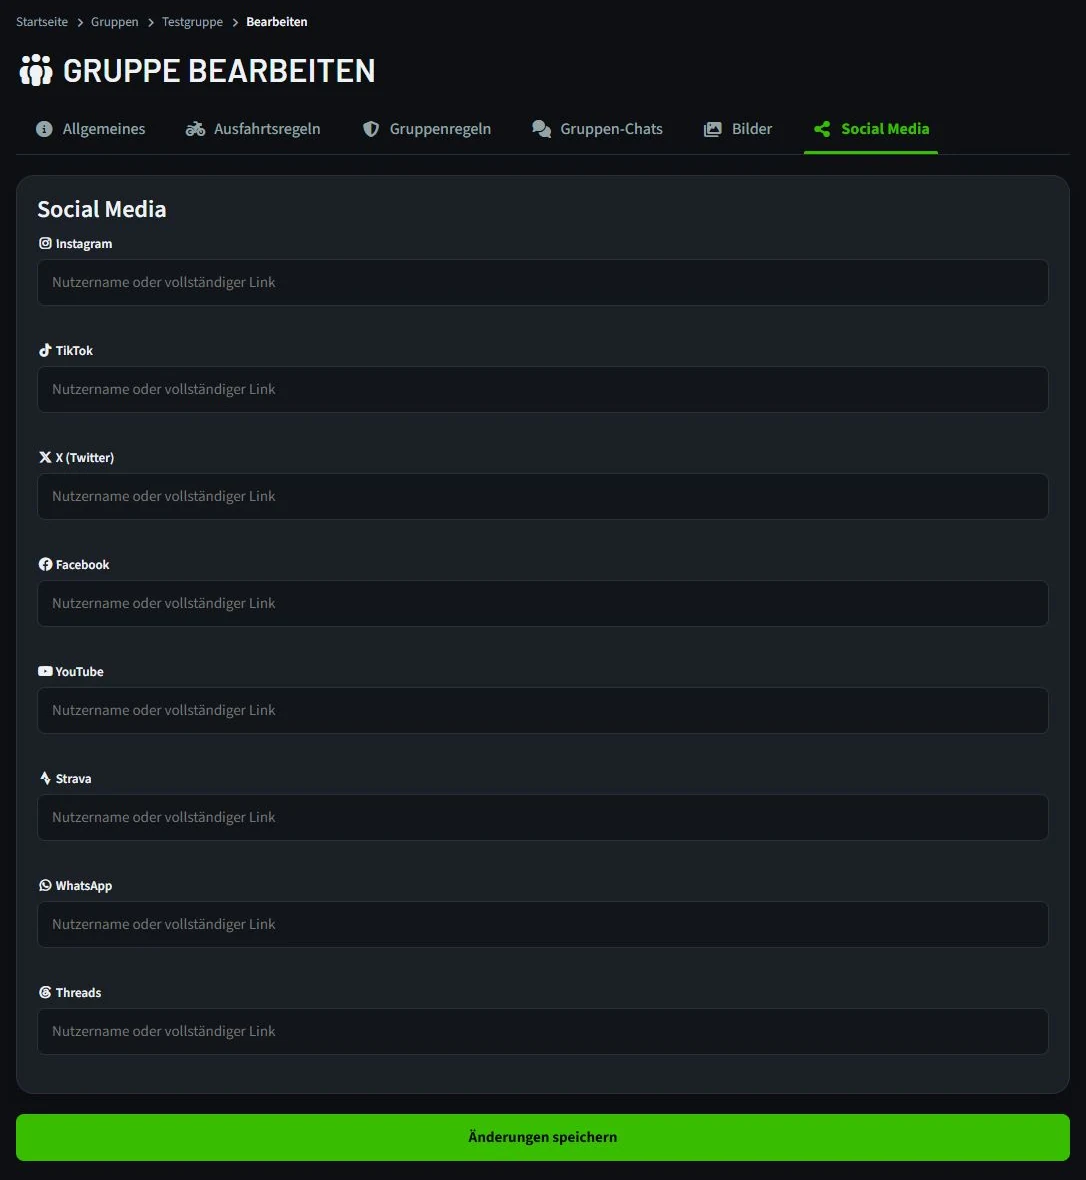
In the "Social media" tab you enter usernames or full links. Only choose channels you actually keep up to date. One current way to get in touch is more helpful than several outdated profiles.
7. Save and check the profile from a visitor's point of view
Click "Save changes". RideTree then takes you back to the group profile. Read the description and rules again on your phone and check the avatar, banner, location and links. Ask yourself: does a new rider now know what to expect from the group?
A complete profile is a good start. A short welcome, a current announcement or a first shared event also shows that the group is active. Keep the details up to date later if your meeting point, riding style or contact options change.
- Name and description explain region, riding style and target audience.
- Location, visibility and joining suit the group.
- Avatar and banner are clearly recognisable.
- Rules and external links are up to date.